This Old House Part 32 of 63453 – Bathroom Preperation for Tile
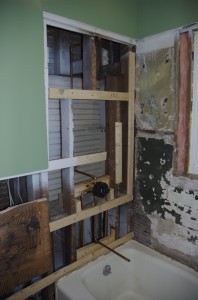
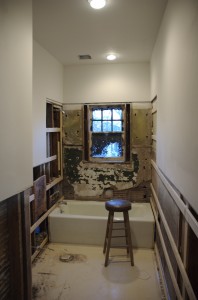
Once my walls were completed the first order of business to tackle was to get a working bathroom again in my house. To do this I needed to do the following to get the bathroom ready for tile.
- Rough in all the plumbing in the bathroom
- Sand, prime, paint all the walls
- Install the replacement window
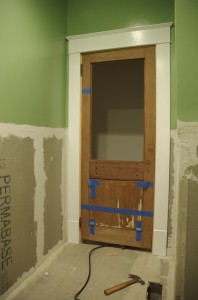
- Hang and install the new bathroom door in the rough opening
Once the tile is installed the bathroom will be ready to go after installing the sink and toilet.
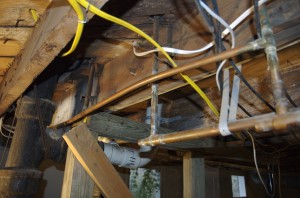
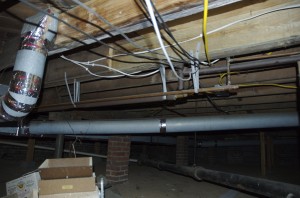
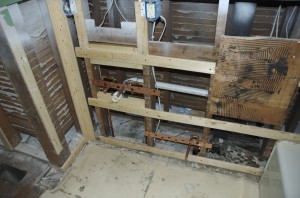
I ended up re-doing most of the plumbing to the bathroom as the previous plumbers had done very shoddy work. First off they used the wrong type of copper pipe (Type M – You should use type L for water it’s a bit thicker than M). Secondly they didn’t support any of the plumbing properly at all. Most of it was just hung by plastic straps from the framing and it was allowed to swing from side to side a few inches at least. And last they bent some of the pipes instead of routing them around properly.
This meant that I ended up redoing almost all the copper supply lines from where they split off the house main feeds. It took me a few days, but it did get completed. All of the pipes are secured very well to the framing. I also replaced the sink drain as the old galvanized drain line was so corroded that no more than 1/2″ remained inside for water to flow in the original 1 1/4″ line.
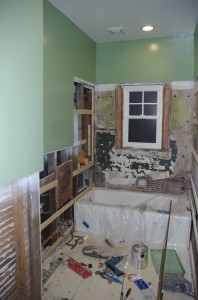
When the walls were completed they were supposed to be “ready for paint” but there were still plenty of areas that needed sanding so I ended up hand sanding lots of fuzzy spots on the ceiling and walls in the bathroom (and will have to in the rest of the house as well) and opted to re-prime all the surfaces in the bathroom. My wall contractor should have fixed all of that but the last thing I needed was any more delays caused by him, so I just sucked it up and did it myself in 10-15 minutes.
The color I chose for the bathroom was Valspar’s La Fonda Tortuga. It turns out the bathroom was originally that same color as the La Fonda series from Valspar is part of the historic trust for preservation series. I didn’t plan on it happening but it’s sorta cool that it is the same color.
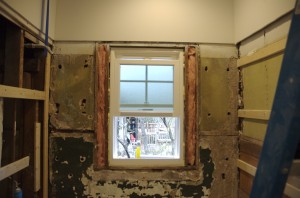
Since I opted to re-expose the window that was originally above the bathtub I needed to replace it with something that wouldn’t rot. Even though I restored the rest of the windows in the house leaving a wooden window in a shower surround is a crazy idea. To be able to have a window and mitigate as much chance of it being a problem I got a custom (frosted glass) replacement vinyl window from Lowes. There is nothing in it that can rot and hopefully it turns out it was the best option for the shower. I had originally thought about putting glass blocks there, but I liked the idea of being able to crack the top of a window when taking a shower to help pull more steam out than the fan alone would.
Installing it wasn’t too bad with the exception of stripping one the mounting screws trying to secure it to the original window frame. The old wood in my house is like concrete after drying for close to 90 years. I always try and pre-drill the holes when putting screws into it but once in a while I get lazy. I didn’t have a bit that would go all the way through the frame and I thought “surely I can screw the remaining 1/4 inch without drilling it”. Obviously I was wrong. Either way the window is in place and sealed and secure.
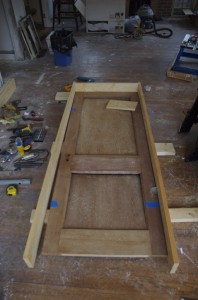
The last thing I needed to do before the guys could get started on the tile was to hang the bathroom door. I took it to Guilford Builders and had then square it up and then built a frame for it on the floor and hung it like a pre-hung door. I have shown this technique before in my blog so I won’t repeat it here. I also painted all the door trim so that it could be installed once the backer-board was installed and the tile guys had something to tile up against. The door ended up still not being totally square (there was a slight cup/bow in the door near the lock set). I was able to work around it and got it hung despite it not being totally squared up.
So now the tile guys have been at work since Tuesday. I am hoping that by next Tuesday or Wednesday I will be able to re-install my toilet and spend the night at my house for the first time since the end of October. (Thanks wall guy for delaying me a few months).
