Archive

Archive for May, 2010

This Old House Part 35 of 63453 – Window Restoration

May 9th, 2010 Comments off

Restoring the window sashes is a multi-step process I have not likely covered so I thought I would walk everyone through the process of restoring the window sashes..

There are many reasons to restore old window sashes than replace them with replacement windows.  In many cases the overall insulation savings in replacing all the windows takes many years (20+) to pay for itself, where as with original windows you can restore them and install storm windows on the outside and the entire process can pay for itself in a year or two.  Then there is the historic restoration angle; You are cutting down on landfill waste, reusing, and using the original windows is almost always going to be more aesthetically pleasing.

Step 1 – Remove window sashes from window frames.

I won’t cover this in great detail, mostly since I don’t have good photos of removing a window sash, and you can easily see how it’s done on the internet with a quick search.  In general you remove the weight pockets on either side, remove all stops, and then cut the cords and remove the sashes.  Be sure when you remove your sashes that you label which window they came from in case they are not uniform in size.  All mine seem to be uniform, but I didn’t want to take that chance.

Windows and other trim being sent off for stripping.

Windows and other trim being sent off for stripping.

Step 2 – Remove all old paint (I paid to have this done)

In my case the windows were covered with multiple layers of paint that were cracked, chipping, and overall not a decent surface.  I also opted to stain my sashes so the only way to get them down to bare wood again was to send them off to be stripped.. If you were really daring you could do the stripping yourself, but I found a guy near me that stripped my window sashes pretty cheap and brought them back ready for re-glazing.
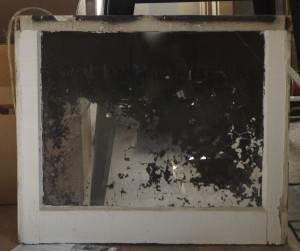
What the original sashes looked like before stripping. (Note the black paint wasn't on the other sashes)
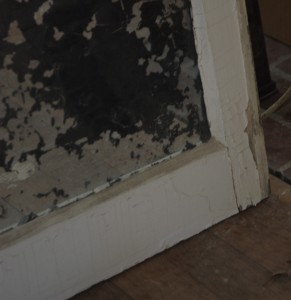
What the original sashes looked like before stripping. (Note the black paint wasn't on the other sashes)

Detail of the condition of the paint on the sashes before stripping.

Detail of the condition of the paint on the sashes before stripping. You can see the many many layers of cracking paint.

Step 3 – Replace glazing (I paid to have this done)

Glazing is the sorta putty like stuff that holds the panes of glass in place in the window sash.  It needs to be replaced from time to time as the sun dries it out, and in my case stripping also ravages the glazing.  I found a guy to re-do this for me as well since it is a tedious process that is similar to artistry.  There are plenty of instructions online on how to complete this process if you want to do it yourself.

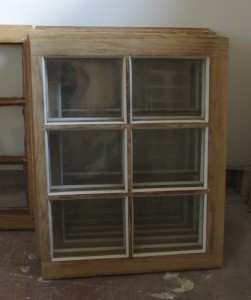
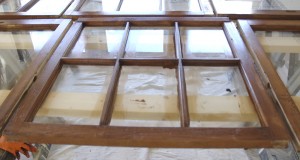
Stripped sash with new glazing in place.

Stripped sash with new glazing in place.

Step 4 – Patch Holes / Defects in wood

Some of my sashes had small rotted areas.  If you are painting the sash I would use an epoxy like filler, but I wanted to stain mine so I got some stain-able wood filler.  This is just applied to the holes with a putty knife, allowed to dry and then sanded.

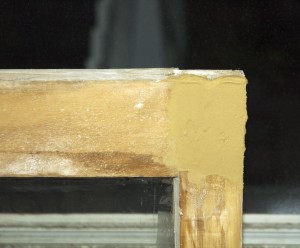
Wood Filler on Window Sash

Wood Filler on Window Sash

Step 5 – Sand Sashes

This step is pretty self explanatory.  All wood filler needs to be removed and the sash needs to be smooth for whatever coating you are going to put on the window.  I used a 220 grit sanding sponge on the 26 window sashes in my house I restored.  It only took a few minutes.

Step 6 – Protect Glazing

The glazing should not directly be exposed to the outside elements, and since I was staining my windows I needed to paint the glazing separately from the wood on the sashes.  I just went to Lowe’s and found a brown paint that was similar to the color of the stain I was using and tediously painted all the glazing.  If you are painting the sashes you can omit this step.

Painted glazing on window sash

Painted glazing on window sash

Step 7 – Stain / Paint / Polyurethane Sashes

This step doesn’t need much explanation.  In my case I stained both side of the sashes, and then applied a single coat of polyurethane. If  you are painting you will need to prime and paint the sashes.  I opted to only use one coat of poly because I only wanted to make them shiny and protect them from the elements, and not add much thickness to them.

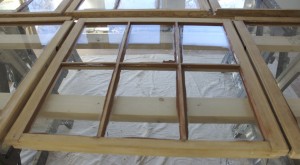
Stained window sash

Stained window sash

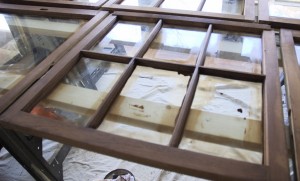
Same sash with one coat of polyurethane.

Same sash with one coat of polyurethane. You can see how it has a nice shine to it.

Step 8 – Prepare window frames

The window frames in my house also had many layers of paint.  I scrapped, stripped, and sanded them down to a smooth uniform surface.  I then used a good primer, and painted them with a white high gloss paint.  You can do this step at any point once the sashes are removed; which would highly be recommended. The main goal is to get smooth surface for the window sashes to move up and down.  This means you don’t need to worry nearly as much about the tops and bottoms of the frames, but the sides more so.  I was able to get most of the paint off with a good sharp paint scraper, and then used a product called “Soy-Gel” sold by Franmar Chemical to remove whatever else remained.  After this I sanded the frames by hand with some sanding sponges until they were as smooth as they were going to get.  Some frames ended up all the way down to bare wood, others still have some layers of paint, but were still smooth.
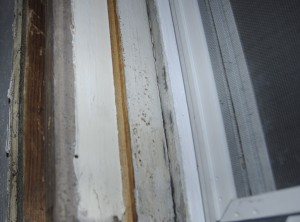
Paint on window sashes before scraping and stripping.

Paint on window sashes before scraping and stripping. You can see the sides of the frames are not smooth at all.

Step 9 – Re-install window sashes

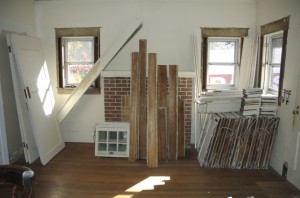
Re-installing the windows is the reverse process of removal.. You re-hang the top sash first, then install the parting bead.. When re-installing the windows I paint the parting bead before I install it in, and then paint any gap that might exist between the parting bead and the existing frame.. I then let the paint dry overnight before installing the bottom sash.  As far as the type of knot you use for hanging the weights I was told by the guy that re-glazed my windows to use what I think is called the bowline knot.  Also when you re-install the cord you should put a screw where the knot goes into the sash.
Categories: Grayland House Tags:

This Old House Part 34 of 63453 – Attic Insulation

May 9th, 2010 Comments off

I had always know that I needed to improve the energy efficiency of my house when I bought it.. The attic clearly didn’t have modern day insulation.. There was 2-3 inches (at most) of beaten down fiberglass insulation, but that was about it.. There also was a gaping hole from the basement up to the attic where the sewer vent ran that just let heat/cool air escape to the attic and into the outside world..

Background

Over a year or two ago I had finished most of the electrical work that needed to be done in the attic, and was sure to leave all the junction boxes above the level where insulation would one day be placed.. Modern insulation suggestions for North Carolina are R-38 or more in the ceiling which equates to at least a foot of blown-in insulation..

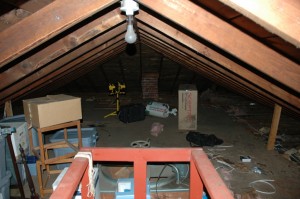
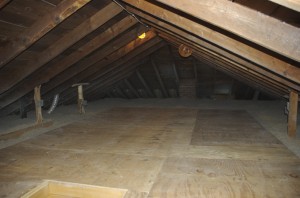
Attic as it was when I got the house

Attic as it was when I got the house

What to do with the existing floor?

Because I needed so much insulation it meant that I had two options.. One was to remove all storage from the attic by just removing the floor / blowing insulation over it, or the second was to remove the existing floor, raise the floor up, blow in insulation, and re-install flooring material.  I opted for the second route since my house has very little storage in the basement and 2 very small closets.. To raise the floor I used 2×8 lumber which on top of the existing 2×6(ish) boards would give me 13 inches to the top of the raised floor.. I figure the original framing was around 5 3/4″ high, and a standard 2×8 is 7 1/4 inches high if you are wondering about my math..

Venting

In the process of having the exterior of the house painted I had extra venting installed into the attic in the form of 2″ holes (with grates) under the eaves to help improve airflow.. I am not sure how much it helped but given the style of my house’s roof structure there wasn’t much of any other option.. I installed baffles around these holes so that they were not blocked when I blew in the insulation.. If you read up on insulating a house you need to make sure the attic can breathe; i.e that it has adequate air intake and outlets, otherwise hot air just gets trapped in the attic and it negates lots of what the insulation is trying to do..  Inadequate venting can also lead to moisture problems, but I won’t cover this as you can read about with a quick internet search.. The venting in my house is as good as it’s going to get for now, and whenever it comes to have the roof re-done I will install a ridge vent to improve the air outlet, but that will be a ways away..

Raising the floor

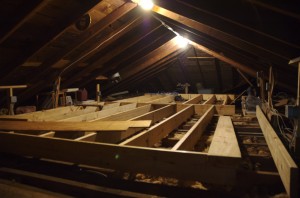
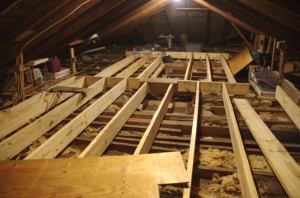
To raise the floor once all the other prep work was done I ripped up the old floor, and built a 20×10 frame out of 2×8 lumber.. I opted to use joist hangers for the connections to simplify the construction in such a cramped space.. I am very glad that I built the framing during December when my walls were still being repaired because it was a bearable temperature up there (I’d guess 60ish degrees when it was in the 30s outside).. To attach the new framing to the existing structure I used hurricane straps.. Most of this is likely over-kill structurally but the ease of use of the hurricane straps won out in the end, besides they are very inexpensive at any home improvement store.

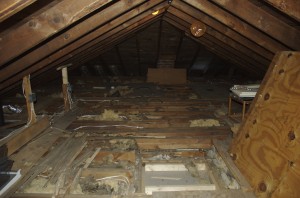
Most of the old flooring ripped out

Most of the old flooring ripped out

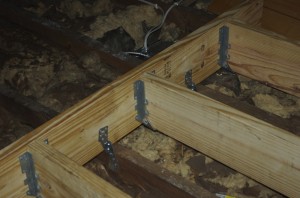
Joist Hangers and Hurricane Straps

Joist Hangers and Hurricane Straps

Framing Partway Installed

Framing Partway Installed

Framing Partly Installed

Framing Partly Installed

Blowing in Insulation

Once the new raised floor had been installed, and all other prep-work had been done (close air gaps into the inside of the house, etc) it came time to blow in the insulation.. I got the stuff they sell at Lowes (Green Fiber) and rented the hopper.. The stuff is non-itch and is mostly old newspaper and other paper products.. I had some friends who had blown in their own insulation and they said the hardest thing they encountered was keeping the hopper full and that it took about 2-3 hours.. In my case the hardest thing was keeping the hopper from clogging, and because it spent more time clogged than flowing properly it took 5-6 hours to get all the insulation up there.. I ended up using 61 bales of insulation, and have about 13 inches of insulation up there now.. I have already noticed since Wednesday (Insulation day) that the house has stayed much cooler, and hopefully this will also be reflected in my Heating and Air Conditioning bills..

End Result

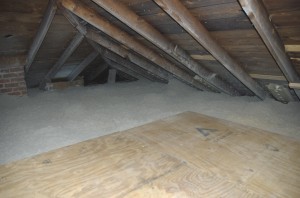
The final results look way better than I had expected.. Then again it’s just an attic so who cares about looks right?  When putting the floor back down I was able to re-use most of the old plywood and just turned the sooty side down and trimmed off any excess with a circular saw.. The only thing I haven’t done that remains in the attic is install a 2×4 bumper around the edge so you can’t accidentally slide stuff into the insulation and loose it, but that will wait for another day since it’s still pretty warm up there..

New floor installed surrounded by a sea of old newspapers

New floor installed surrounded by a sea of old newspapers

The sea from another angle

The sea from another angle. You can also see the cardboard baffle I built around the large vent in the back porch ceiling.

Categories: Grayland House Tags: