This Old House Part 33 of 63453 – Bathroom Tile
So the bathroom tiling went much smoother than the plaster repair.. The guys I got to do it did a great job, and completed the job in a timely fashion and professionally.. The design I was going for was something that would fit the period of the house.. I.E. 1920′s Arts and Crafts.. I wanted to re-expose the window, get a pedestal sink, and restore the ceiling to its original height, and make it look close to what would have potentially been in the house.. Some major differences from the original and my plan were there likely would have been a claw-foot tub (I opted to keep the cast iron tub that came with the house), and there also would have been far less light, and no vent fan, etc..
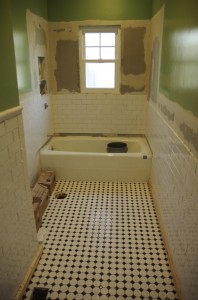
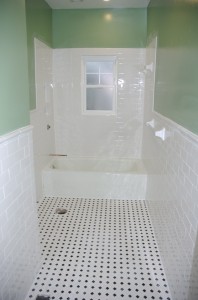
For the tile I wanted to use white subway tile on the wall, and some sort of black and white mosaic on the floor.. Many of the period bathrooms I have seen photos of, or been in in person had white octagon tiles with a black one every so often.. I wasn’t able to find this same thing, but I found another really cool mosaic pattern.. It has black diamonds and white squares.. They got the subway tile from Florida Tile which was part of a collection of their “retroclassic” line.. The tile isn’t uniform in shape and once grouted gives it a more aged look.. At first I was hesitant before the grouting happened, but once grouted the tile looks great.. I also had a recessed shelf put in under the shower head for storing shampoo, etc.. This should likely cut down on all of the clutter around the tub when it goes into use..
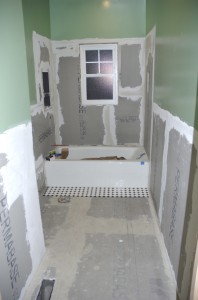
The first thing my guys did was lay down 1/2″ backer board on all the surfaces being tiled, filled the gaps with mortar, and then applied many layers of a sealant to completely water seal the backer board..

Backer board installed with floor tile in place. You can see the sealant applied to the floors but not the walls.
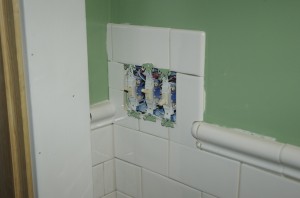
Once the backer board was in place they first laid down the floor tile, and then the wall tile. There was one complication with the installation which was my fault in planing; the light switches for the bathroom were a bit too low to look right given the height of the tile so the solution was to run the tile up around the switch and get a white cover plate for it..
The tiling took a few days to complete, and once grouted looks amazing.. The grout still needs more sealing before I can use the shower, but it’s very close to being 100% usable.. All that remains is building a cabinet door for the medicine cabinet, re-installing the toilet, installing the sink, and installing the shower trim kit..
The finished job looks amazing.. One room is almost complete and only 3 rooms, 2 hallways, and 2 closets remain..


