Archive

Archive for the ‘Grayland House’ Category

This Old House Part 35 of 63453 – Window Restoration

May 9th, 2010 Comments off

Restoring the window sashes is a multi-step process I have not likely covered so I thought I would walk everyone through the process of restoring the window sashes..

There are many reasons to restore old window sashes than replace them with replacement windows.  In many cases the overall insulation savings in replacing all the windows takes many years (20+) to pay for itself, where as with original windows you can restore them and install storm windows on the outside and the entire process can pay for itself in a year or two.  Then there is the historic restoration angle; You are cutting down on landfill waste, reusing, and using the original windows is almost always going to be more aesthetically pleasing.

Step 1 – Remove window sashes from window frames.

I won’t cover this in great detail, mostly since I don’t have good photos of removing a window sash, and you can easily see how it’s done on the internet with a quick search.  In general you remove the weight pockets on either side, remove all stops, and then cut the cords and remove the sashes.  Be sure when you remove your sashes that you label which window they came from in case they are not uniform in size.  All mine seem to be uniform, but I didn’t want to take that chance.

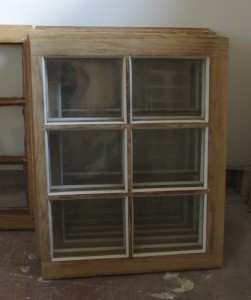
Windows and other trim being sent off for stripping.

Windows and other trim being sent off for stripping.

Step 2 – Remove all old paint (I paid to have this done)

In my case the windows were covered with multiple layers of paint that were cracked, chipping, and overall not a decent surface.  I also opted to stain my sashes so the only way to get them down to bare wood again was to send them off to be stripped.. If you were really daring you could do the stripping yourself, but I found a guy near me that stripped my window sashes pretty cheap and brought them back ready for re-glazing.
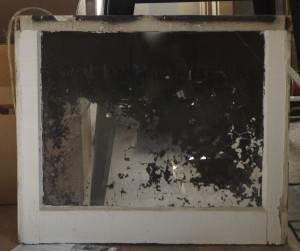
What the original sashes looked like before stripping. (Note the black paint wasn't on the other sashes)
What the original sashes looked like before stripping. (Note the black paint wasn't on the other sashes)

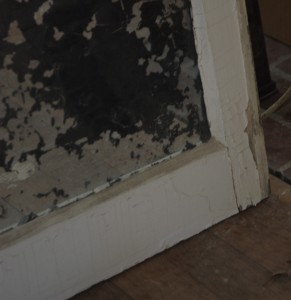
Detail of the condition of the paint on the sashes before stripping.

Detail of the condition of the paint on the sashes before stripping. You can see the many many layers of cracking paint.

Step 3 – Replace glazing (I paid to have this done)

Glazing is the sorta putty like stuff that holds the panes of glass in place in the window sash.  It needs to be replaced from time to time as the sun dries it out, and in my case stripping also ravages the glazing.  I found a guy to re-do this for me as well since it is a tedious process that is similar to artistry.  There are plenty of instructions online on how to complete this process if you want to do it yourself.

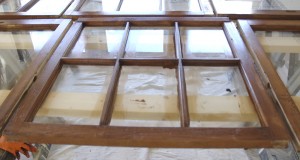
Stripped sash with new glazing in place.

Stripped sash with new glazing in place.

Step 4 – Patch Holes / Defects in wood

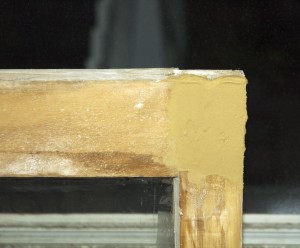
Some of my sashes had small rotted areas.  If you are painting the sash I would use an epoxy like filler, but I wanted to stain mine so I got some stain-able wood filler.  This is just applied to the holes with a putty knife, allowed to dry and then sanded.

Wood Filler on Window Sash

Wood Filler on Window Sash

Step 5 – Sand Sashes

This step is pretty self explanatory.  All wood filler needs to be removed and the sash needs to be smooth for whatever coating you are going to put on the window.  I used a 220 grit sanding sponge on the 26 window sashes in my house I restored.  It only took a few minutes.

Step 6 – Protect Glazing

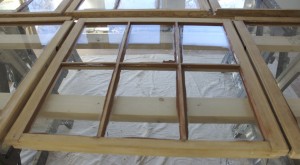
The glazing should not directly be exposed to the outside elements, and since I was staining my windows I needed to paint the glazing separately from the wood on the sashes.  I just went to Lowe’s and found a brown paint that was similar to the color of the stain I was using and tediously painted all the glazing.  If you are painting the sashes you can omit this step.

Painted glazing on window sash

Painted glazing on window sash

Step 7 – Stain / Paint / Polyurethane Sashes

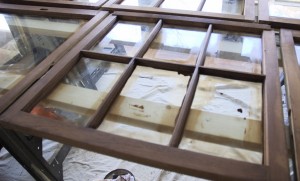
This step doesn’t need much explanation.  In my case I stained both side of the sashes, and then applied a single coat of polyurethane. If  you are painting you will need to prime and paint the sashes.  I opted to only use one coat of poly because I only wanted to make them shiny and protect them from the elements, and not add much thickness to them.

Stained window sash

Stained window sash

Same sash with one coat of polyurethane.

Same sash with one coat of polyurethane. You can see how it has a nice shine to it.

Step 8 – Prepare window frames

The window frames in my house also had many layers of paint.  I scrapped, stripped, and sanded them down to a smooth uniform surface.  I then used a good primer, and painted them with a white high gloss paint.  You can do this step at any point once the sashes are removed; which would highly be recommended. The main goal is to get smooth surface for the window sashes to move up and down.  This means you don’t need to worry nearly as much about the tops and bottoms of the frames, but the sides more so.  I was able to get most of the paint off with a good sharp paint scraper, and then used a product called “Soy-Gel” sold by Franmar Chemical to remove whatever else remained.  After this I sanded the frames by hand with some sanding sponges until they were as smooth as they were going to get.  Some frames ended up all the way down to bare wood, others still have some layers of paint, but were still smooth.
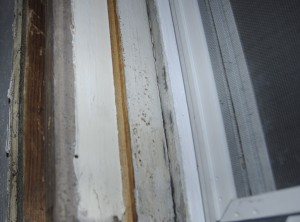
Paint on window sashes before scraping and stripping.

Paint on window sashes before scraping and stripping. You can see the sides of the frames are not smooth at all.

Step 9 – Re-install window sashes

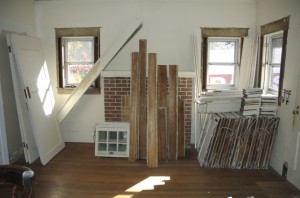
Re-installing the windows is the reverse process of removal.. You re-hang the top sash first, then install the parting bead.. When re-installing the windows I paint the parting bead before I install it in, and then paint any gap that might exist between the parting bead and the existing frame.. I then let the paint dry overnight before installing the bottom sash.  As far as the type of knot you use for hanging the weights I was told by the guy that re-glazed my windows to use what I think is called the bowline knot.  Also when you re-install the cord you should put a screw where the knot goes into the sash.
Categories: Grayland House Tags:

This Old House Part 34 of 63453 – Attic Insulation

May 9th, 2010 Comments off

I had always know that I needed to improve the energy efficiency of my house when I bought it.. The attic clearly didn’t have modern day insulation.. There was 2-3 inches (at most) of beaten down fiberglass insulation, but that was about it.. There also was a gaping hole from the basement up to the attic where the sewer vent ran that just let heat/cool air escape to the attic and into the outside world..

Background

Over a year or two ago I had finished most of the electrical work that needed to be done in the attic, and was sure to leave all the junction boxes above the level where insulation would one day be placed.. Modern insulation suggestions for North Carolina are R-38 or more in the ceiling which equates to at least a foot of blown-in insulation..

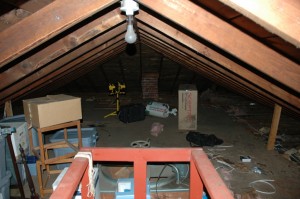
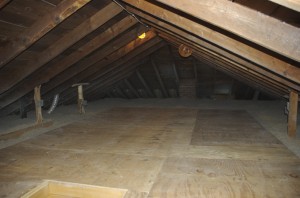
Attic as it was when I got the house

Attic as it was when I got the house

What to do with the existing floor?

Because I needed so much insulation it meant that I had two options.. One was to remove all storage from the attic by just removing the floor / blowing insulation over it, or the second was to remove the existing floor, raise the floor up, blow in insulation, and re-install flooring material.  I opted for the second route since my house has very little storage in the basement and 2 very small closets.. To raise the floor I used 2×8 lumber which on top of the existing 2×6(ish) boards would give me 13 inches to the top of the raised floor.. I figure the original framing was around 5 3/4″ high, and a standard 2×8 is 7 1/4 inches high if you are wondering about my math..

Venting

In the process of having the exterior of the house painted I had extra venting installed into the attic in the form of 2″ holes (with grates) under the eaves to help improve airflow.. I am not sure how much it helped but given the style of my house’s roof structure there wasn’t much of any other option.. I installed baffles around these holes so that they were not blocked when I blew in the insulation.. If you read up on insulating a house you need to make sure the attic can breathe; i.e that it has adequate air intake and outlets, otherwise hot air just gets trapped in the attic and it negates lots of what the insulation is trying to do..  Inadequate venting can also lead to moisture problems, but I won’t cover this as you can read about with a quick internet search.. The venting in my house is as good as it’s going to get for now, and whenever it comes to have the roof re-done I will install a ridge vent to improve the air outlet, but that will be a ways away..

Raising the floor

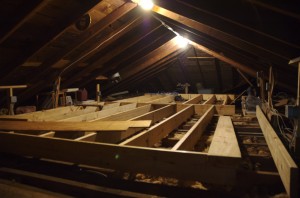
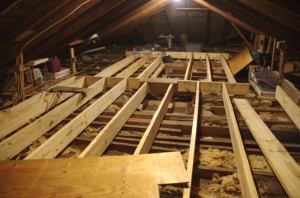
To raise the floor once all the other prep work was done I ripped up the old floor, and built a 20×10 frame out of 2×8 lumber.. I opted to use joist hangers for the connections to simplify the construction in such a cramped space.. I am very glad that I built the framing during December when my walls were still being repaired because it was a bearable temperature up there (I’d guess 60ish degrees when it was in the 30s outside).. To attach the new framing to the existing structure I used hurricane straps.. Most of this is likely over-kill structurally but the ease of use of the hurricane straps won out in the end, besides they are very inexpensive at any home improvement store.

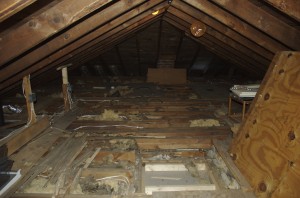
Most of the old flooring ripped out

Most of the old flooring ripped out

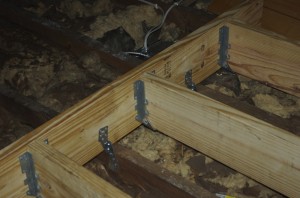
Joist Hangers and Hurricane Straps

Joist Hangers and Hurricane Straps

Framing Partway Installed

Framing Partway Installed

Framing Partly Installed

Framing Partly Installed

Blowing in Insulation

Once the new raised floor had been installed, and all other prep-work had been done (close air gaps into the inside of the house, etc) it came time to blow in the insulation.. I got the stuff they sell at Lowes (Green Fiber) and rented the hopper.. The stuff is non-itch and is mostly old newspaper and other paper products.. I had some friends who had blown in their own insulation and they said the hardest thing they encountered was keeping the hopper full and that it took about 2-3 hours.. In my case the hardest thing was keeping the hopper from clogging, and because it spent more time clogged than flowing properly it took 5-6 hours to get all the insulation up there.. I ended up using 61 bales of insulation, and have about 13 inches of insulation up there now.. I have already noticed since Wednesday (Insulation day) that the house has stayed much cooler, and hopefully this will also be reflected in my Heating and Air Conditioning bills..

End Result

The final results look way better than I had expected.. Then again it’s just an attic so who cares about looks right?  When putting the floor back down I was able to re-use most of the old plywood and just turned the sooty side down and trimmed off any excess with a circular saw.. The only thing I haven’t done that remains in the attic is install a 2×4 bumper around the edge so you can’t accidentally slide stuff into the insulation and loose it, but that will wait for another day since it’s still pretty warm up there..

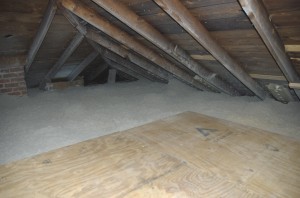
New floor installed surrounded by a sea of old newspapers

New floor installed surrounded by a sea of old newspapers

The sea from another angle

The sea from another angle. You can also see the cardboard baffle I built around the large vent in the back porch ceiling.

Categories: Grayland House Tags:

This Old House Part 33 of 63453 – Bathroom Tile

February 9th, 2010 Comments off

So the bathroom tiling went much smoother than the plaster repair.. The guys I got to do it did a great job, and completed the job in a timely fashion and professionally.. The design I was going for was something that would fit the period of the house.. I.E. 1920′s Arts and Crafts.. I wanted to re-expose the window, get a pedestal sink, and restore the ceiling to its original height, and make it look close to what would have potentially been in the house.. Some major differences from the original and my plan were there likely would have been a claw-foot tub (I opted to keep the cast iron tub that came with the house), and there also would have been far less light, and no vent fan, etc..

For the tile I wanted to use white subway tile on the wall, and some sort of black and white mosaic on the floor.. Many of the period bathrooms I have seen photos of, or been in in person had white octagon tiles with a black one every so often.. I wasn’t able to find this same thing, but I found another really cool mosaic pattern.. It has black diamonds and white squares.. They got the subway tile from Florida Tile which was part of a collection of their “retroclassic” line.. The tile isn’t uniform in shape and once grouted gives it a more aged look.. At first I was hesitant before the grouting happened, but once grouted the tile looks great.. I also had a recessed shelf put in under the shower head for storing shampoo, etc.. This should likely cut down on all of the clutter around the tub when it goes into use..

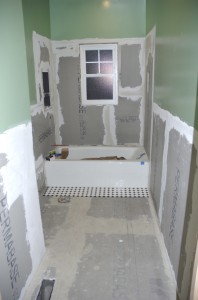
The first thing my guys did was lay down 1/2″ backer board on all the surfaces being tiled, filled the gaps with mortar, and then applied many layers of a sealant to completely water seal the backer board..

Backer board installed with floor tile in place

Backer board installed with floor tile in place. You can see the sealant applied to the floors but not the walls.

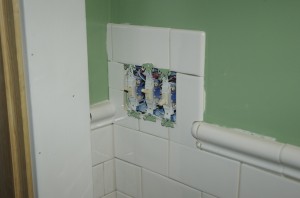
Once the backer board was in place they first laid down the floor tile, and then the wall tile.  There was one complication with the installation which was my fault in planing; the light switches for the bathroom were a bit too low to look right given the height of the tile so the solution was to run the tile up around the switch and get a white cover plate for it..

Light switch compromise

Light switch compromise

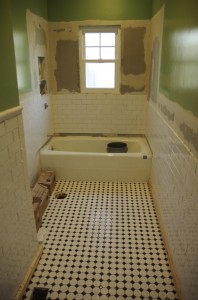
The tiling took a few days to complete, and once grouted looks amazing.. The grout still needs more sealing before I can use the shower, but it’s very close to being 100% usable.. All that remains is building a cabinet door for the medicine cabinet, re-installing the toilet, installing the sink, and installing the shower trim kit..

Floor tile down, and some of the wall tile installed.

Floor tile down, and some of the wall tile installed.

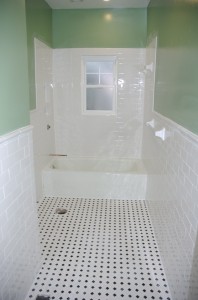
The finished job looks amazing.. One room is almost complete and only 3 rooms, 2 hallways, and 2 closets remain..

Tile job complete

Tile job complete

Categories: Grayland House Tags:

This Old House Part 32 of 63453 – Bathroom Preperation for Tile

January 31st, 2010 Comments off

Once my walls were completed the first order of business to tackle was to get a working bathroom again in my house.  To do this I needed to do the following to get the bathroom ready for tile.

  • Rough in all the plumbing in the bathroom
  • Sand, prime, paint all the walls
  • Install the replacement window
  • Hang and install the new bathroom door in the rough opening

Once the tile is installed the bathroom will be ready to go after installing the sink and toilet.

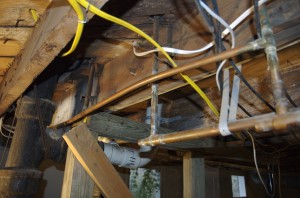
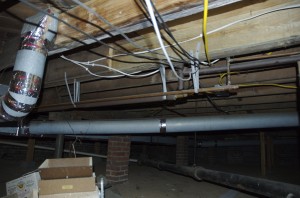
I ended up re-doing most of the plumbing to the bathroom as the previous plumbers had done very shoddy work.  First off they used the wrong type of copper pipe (Type M – You should use type L for water it’s a bit thicker than M).  Secondly they didn’t support any of the plumbing properly at all.  Most of it was just hung by plastic straps from the framing and it was allowed to swing from side to side a few inches at least. And last they bent some of the pipes instead of routing them around properly.

Orignal supply lines hanging from plastic straps

Original supply lines hanging from plastic straps

Original pipes from a different angle.

Original pipes from a different angle.

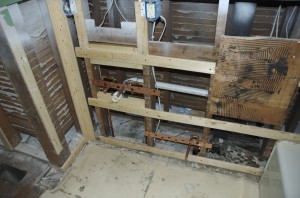
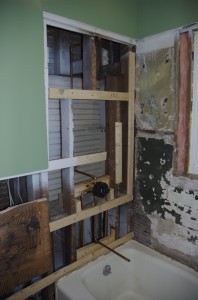
This meant that I ended up redoing almost all the copper supply lines from where they split off the house main feeds.  It took me a few days, but it did get completed.  All of the pipes are secured very well to the framing.  I also replaced the sink drain as the old galvanized drain line was so corroded that no more than 1/2″ remained inside for water to flow in the original 1 1/4″ line.

New sink plumbing secured to the wall and the new drain installed.

New sink plumbing secured to the wall and the new drain installed.

Shower rough plumbing.

Shower rough plumbing.

When the walls were completed they were supposed to be “ready for paint” but there were still plenty of areas that needed sanding so I ended up hand sanding lots of fuzzy spots on the ceiling and walls in the bathroom (and will have to in the rest of the house as well) and opted to re-prime all the surfaces in the bathroom.  My wall contractor should have fixed all of that but the last thing I needed was any more delays caused by him, so I just sucked it up and did it myself in 10-15 minutes.

The color I chose for the bathroom was Valspar’s La Fonda Tortuga.  It turns out the bathroom was originally that same color as the La Fonda series from Valspar is part of the historic trust for preservation series.  I didn’t plan on it happening but it’s sorta cool that it is the same color.

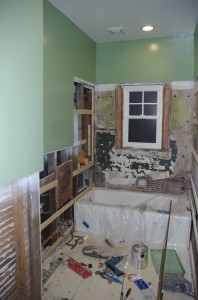
Bathroom when walls were completed.

Bathroom when walls were completed.

Painted bathroom walls.

Painted bathroom walls and ceiling.

Since I opted to re-expose the window that was originally above the bathtub I needed to replace it with something that wouldn’t rot.  Even though I restored the rest of the windows in the house leaving a wooden window in a shower surround is a crazy idea.  To be able to have a window and mitigate as much chance of it being a problem I got a custom (frosted glass) replacement vinyl window from Lowes.  There is nothing in it that can rot and hopefully it turns out it was the best option for the shower.  I had originally thought about putting glass blocks there, but I liked the idea of being able to crack the top of a window when taking a shower to help pull more steam out than the fan alone would.

Installing it wasn’t too bad with the exception of stripping one the mounting screws trying to secure it to the original window frame.  The old wood in my house is like concrete after drying for close to 90 years.  I always try and pre-drill the holes when putting screws into it but once in a while I get lazy.  I didn’t have a bit that would go all the way through the frame and I thought “surely I can screw the remaining 1/4 inch without drilling it”.  Obviously I was wrong.  Either way the window is in place and sealed and secure.

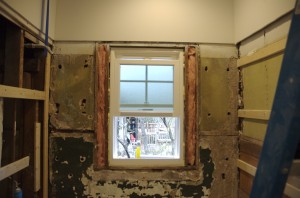
Replacement window in shower surround.

Replacement window in shower surround.

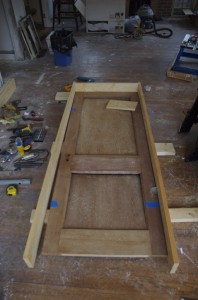
The last thing I needed to do before the guys could get started on the tile was to hang the bathroom door.  I took it to Guilford Builders and had then square it up and then built a frame for it on the floor and hung it like a pre-hung door.  I have shown this technique before in my blog so I won’t repeat it here.  I also painted all the door trim so that it could be installed once the backer-board was installed and the tile guys had something to tile up against.  The door ended up still not being totally square (there was a slight cup/bow in the door near the lock set).  I was able to work around it and got it hung despite it not being totally squared up.

Mostly squared door being hung on the floor.

Mostly squared door being hung on the floor.

Bathroom door hung, trim installed, and backerboard installed.

Bathroom door hung, trim installed, and backerboard installed.

So now the tile guys have been at work since Tuesday.  I am hoping that by next Tuesday or Wednesday I will be able to re-install my toilet and spend the night at my house for the first time since the end of October.  (Thanks wall guy for delaying me a few months).

Categories: Grayland House Tags:

This Old House Part 31 of 63453 – Plaster Repair

January 31st, 2010 Comments off

When I purchased the house on Grayland the walls were cracked all over the place.. Most of it was from normal settling of a structure (My house is 87 years old as of 2010)..   The first two rooms I remodeled (kitchen & dining room) I had skim coated and it brought the walls back to smooth crack-free surfaces.. Since I opted to do the rest of the house at once instead of living in a construction zone multiple times again I had the all the remaining walls in the house skim coated.. The main focus of “phase II” was the bathroom it was the only exception on the skim coating.. The bathroom had been drywalled over top the original plaster and most of it was ruined so it made more sense to take that room all the way down to studs and start fresh with drywall in that once instance.

The process took 79 days to complete.. I was originally quoted 19 total days, but my contractor seemed to take his time.. He is the same guy who did the kitchen and dining room, which he completed within a reasonable time frame.  I don’t know exactly what caused him to take so long, but going 400% over an estimated time is unacceptable.  I won’t get into this too much as it’s not relevant to the blog but I didn’t pay full price for the job and his delay pushed my completion date back at least 2 months if not more.

The process for repairing the walls is pretty interesting. First all the loose plaster is cracked away.  The the walls are painted with a sealing primer to ensure adhesion of the new mud to the old surface. Once this is done all large holes are patched with mud.  Then a fiber mesh is applied to all of the walls and is filled with mud.  This mesh is supposed to keep the walls from cracking again in the future as it adds strength to the walls much like re-bar adds strength to concrete.  Once all of the fiber meshing is covered with mud the walls are sanded smooth and the walls are ready for paint/primer.

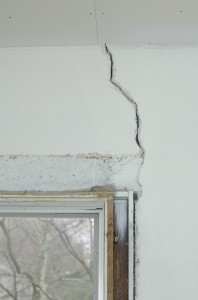
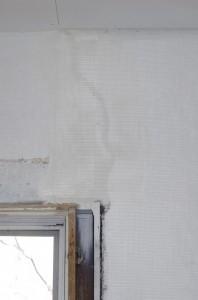
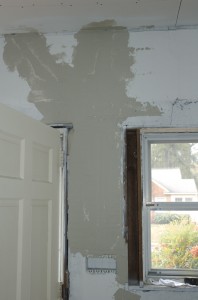
Here are some photos of the process with one of the cracks near a window frame.

One of the original cracks above a window frame.

One of the original cracks above a window frame.

Same crack filled with mud and fiber mesh applied over top

Same crack filled with mud and fiber mesh applied over top.

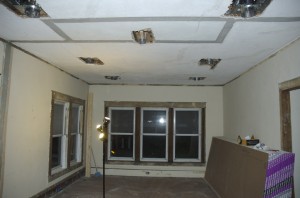
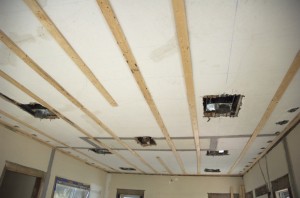
As far as the ceilings are concerned it’s far too much effort to skim coat those, so furring strips (1×3 lumber strips) are applied to the ceiling nailed into the joists and then the ceilings are drywalled..  This means the ceiling is dropped approximately 1 1/4 inches but it’s not a noticeable reduction as it takes the ceiling from 9 feet to 8 feet 10 3/4 inches..

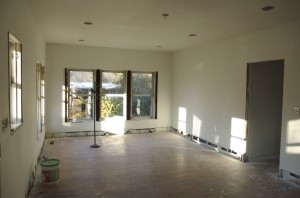
Here are a few photos of the ceilings being furred and then drywalled..

Ceiling in the living room.  Note the recessed lights and electrical box are lowered 1 1/4" from the current ceiling.

Ceiling in the living room. Note the recessed lights and electrical box are lowered from the current ceiling.

Living room with furring strips installed before drywall is applied.

Living room with furring strips installed before drywall is applied.

Living room with new slighly lower drywall ceiling and lighting fixtures flush with the new ceiling.

Living room with new slightly lower drywall ceiling and lighting fixtures flush with the new ceiling.

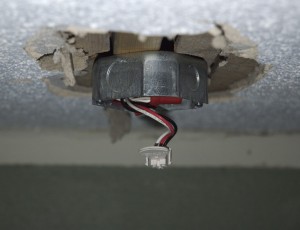
I had to have all of the wiring on the walls and ceilings completed before I got the walls done..You can see from the photos above that all the ceiling electrical boxes needed to be lowered 1 1/4″.. Here is a shot of one of the smoke detector boxes lowered before the new ceiling is installed.

Smoke Detector electrical box lowered 1 1/4" in bedroom.

Smoke Detector electrical box lowered 1 1/4" in bedroom.

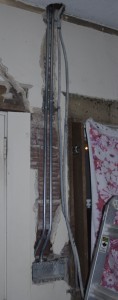
The biggest hassle electrically was the switches by the front door.. Because my exterior walls are solid masonry (i.e. not framed lumber with a wall on either side) I had to install conduit into a crevice in the wall and have that area filled over.. I pulled the old wiring out and ran new conduit through these same holes so that new wire could be pulled in for 3 way switches and one additional switch.
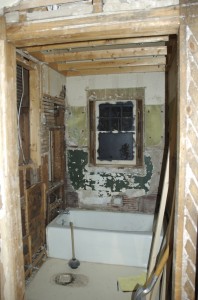
Plaster chipped out and old wiring hanging on the right. The new conduit that is now totally covered by the plaster is on the left along with the new 4 gang electrical box.
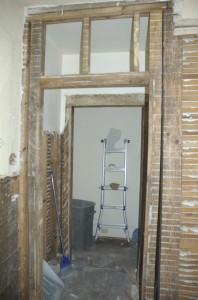
Plaster chipped out and old wiring hanging on the right. The new conduit that is now totally covered by the plaster is on the left along with the new 4 gang electrical box.

Conduit is all covered up and the wall is smooth around it now.

Conduit is all covered up and the wall is smooth around it now.

Categories: Grayland House Tags:

This Old House Part 30 of 63453 – Bathroom Gutting

November 7th, 2009 Comments off

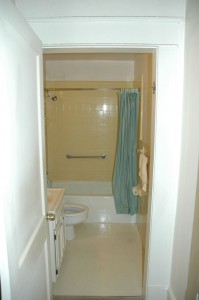
One of the major things that needed to be fixed on my house when I moved in was the bathroom.. The original bathroom was last remodeled in 1982.. Not only did it use horrible yellow/gold tiles, but it had almost no available light.. The only light came from a tiny fluorescent fixture above the sink.. The kicker was that for the remodel they built a drywall box inside the old bathroom covering up the window and original ceiling making the room even more narrow.. The vent fan was also relocated to inside a closet and really didn’t pull much moisture out of the room at all..

orignal_bathroom_scaled

Original Bathroom

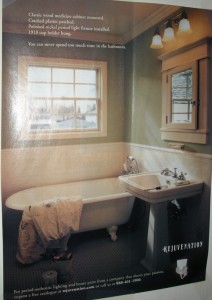
My goal was to redo the bathroom exposing the original walls, window and make it look similar to a rejuvenation ad that I have seen for years in Old House Journal..

Inspiration for new Bathroom

Inspiration for new Bathroom

I opted not to get a clawfoot tub and stick with the cast iron tub that is already in the bathroom and keep the toilet, but the rest of it pretty much had to go.. There also was an inner doorway leading into the bathroom which made it seem even smaller and more cramped.. I am not sure what the original intent was for this second doorway, but it too was to be removed..

I have already ordered and picked up a replacement window for the shower area.. It’s a vinyl/plastic window with frosted glass.. Even though I am restoring the original sashes in the rest of the house it makes no sense to have a wooden window in a shower..

There isn’t much left to say at this point as far as the progress goes, but here are some photos of the demolition..

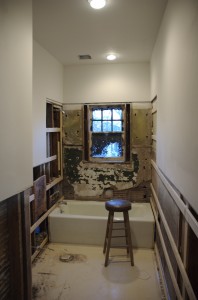
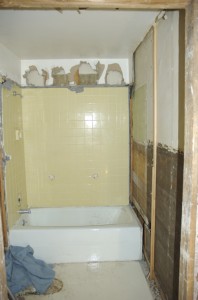
Toilet and sink removed.  One section of tub surround removed.

Toilet and sink removed. One section of tub surround removed.

All tiles removed and window re-exposed.  You can still see the dropped ceiling framing in place.

All tiles removed and window re-exposed. You can still see the dropped ceiling framing in place.

dsc_5306

Inner doorway down to framing and ready for removal.

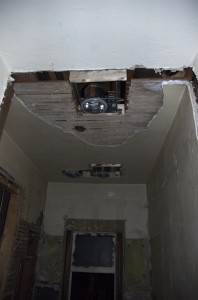
Inner doorway removed, ceiling rexposed and recessed lights and fan installed.

Inner doorway removed, ceiling exposed and recessed lights and fan installed.

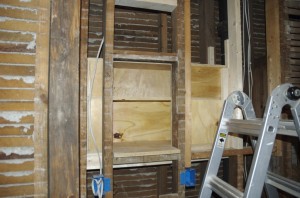
Since there isn’t much storage space in the bathroom and I removed the old “medicine cabinet” above the toilet (which also housed the exhaust fan) I opted to build as large a cabinet as I could in the space between the bathroom wall and the bedroom behind it.. This space is about a foot wide since the sewer vent runs through the space.  I built a cabinet out of 3/4 plywood that extends to the left and right a good amount.  When the wall is drywalled it will be dressed with a mirror like the rejuvination ad above, but it will hold considerably more stuff than it appears to..

Cabinet built into wall

Cabinet built into wall

Currently the bathroom is partially re-walled and is starting to look like a room again.. I still need to order tiles in the next few weeks but either way the bathroom will be much bigger and brighter than before.

Categories: Grayland House Tags:

This Old House Part 29 of 63453 – Stripping Doors and Windows

November 5th, 2009 Comments off

When I remodeled the kitchen and dining room one part that took quite some time was getting the windows and trim stripped, restored / reglazed and put back into place.  This go-round I decided one of the first things I needed to do was get the windows and doors and trim stripped first.. It took a very long time to paint it all last time, so I am trying to give myself as much time as possible while other parts of the project are going on.. I pulled all the windows out and sent them off to a professional stripper who dips the doors / windows / trim in some nasty chemicals and what not but brings them all back to me pretty much like new..

dsc_5222

All of the doors, windows, and trim removed ready to send off for stripping.

I have gotten some of the stuff back already and should be getting the rest of it next week.. My window glazer guy should be in town next week to reglaze all the sashes so I can stain and poly and have them waiting to go back into the window frames..

Categories: Grayland House Tags:

This Old House Part 28 of 63453 – Joist Hangers

October 30th, 2009 Comments off

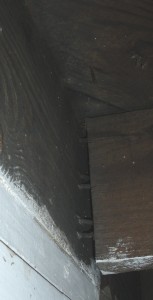
After I got started on preparing the rooms for wall refinishing I noticed that the back bedroom floor was far too bouncy.  Somehow I never noticed it before.  I guess I simply didn’t walk on that portion of the floor much since I bought the house.  I did some research and found that underneath the floor some of the joists were pulling away from the header on the foundation.  Most of the floor joists in the house rest directly on the foundation but the few that support the back bedroom were attached to a wood header sitting on the foundation wall because of a doorway in the basement wall.  Over the last 86 years the foundation has bowed out a little bit and the joists ended up pulling away from this header.  This meant the floor was barely being supported by some nails that were pulled out about 1/2 inch or so instead of being solidly mounted to the header.

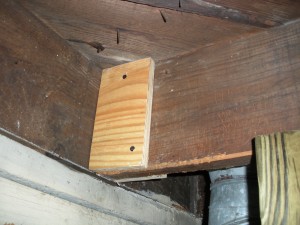
Joist pulling away from header under back bedroom.

One of the floor joists pulling away from header under back bedroom.

The solution to this problem is pretty simple; install joist hangers.  The main problem is that the joists in my house are not standard dimensional lumber sizes.  They look to be 2x8s (normally 1 1/2 x 7 1/4 inches) but they are actually 1/4 inch larger in both dimensions ( 1 3/4 x 7 1/2 inches).  This meant that standard joist hangers I could get at Lowes or Home Depot wouldn’t fit.  To resolve this problem I sandwiched sheets of plywood to the side of each joist that needed a hanger with large wood screws and construction adhesive to get a standard joist width for a double 2×8 (i.e. 3 inches).

This was a pretty simple task once I got hangers and the whole job only took a few hours. I ended up picking up the joist hangers directly at the Simpson Strong Tie southeast distribution warehouse in High Point.  No one locally stocked what I needed, but one of the building suppliers in Greensboro (Pegram West) placed an order with Simpson Strong Tie and I was able to pick it up at the warehouse shortly thereafter.

The process to install the joist hangers was as follows:

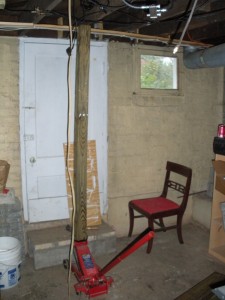
  1. Jack the joist back into the correct position using my car jack (2 1/2 ton jack).  To raise the floors didn’t take much because they were not bearing any load other than the wood flooring.  If the joists were supporting walls I likely would have needed a much larger jack.  Typically a 10-12 ton jack is used for raising joists in houses.
  2. Once each joist was raised up into a better position I sandwiched the joists with some pieces of plywood using large wood screws and construction adhesive.
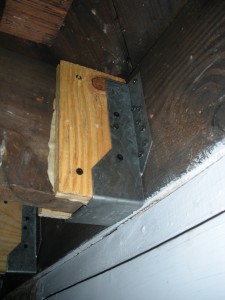
  3. Then I installed a heavy duty joist hanger with wood screws directly into the header and into the joist, and then removed the jack.
Floor Jack being used for raising the floor / joist back into position.

Floor Jack being used for raising the floor / joist back into position. (Step 1)

Plywood Sanwiched to Existing Joists

Plywood Sandwiched to Existing Joists (Step 2)

Completed Joist Hanger now supporting floor

Completed Joist Hanger now supporting floor (Step 3)

This process was repeated for the 6 affected joists and now the floor is far more stable, and also shouldn’t go anywhere anytime soon.

Categories: Grayland House Tags:

This Old House Part 27 of 63453 – Remainder of house

October 30th, 2009 Comments off

So I finally decided to decide to finish the house and live in a construction zone for a while.  Previously all I had remodeled was the Kitchen and the Dining Room.  That left the 2 bedrooms, living room, bathroom, and the hallways.  The largest portion of the remaining rooms is the bathroom.  It will require gutting the entire thing mostly down to studs.  The old bathroom had been “remodeled” in the 80s with horrible yellow tile by building a drywall box inside the old bathroom.

The main plan of attack is broken down into following steps:

  • Remove old windows / doors to send away for stripping
  • Remove old baseboards and picture mould (I opted to replace all of it as it was cheaper to replace than to strip it and re-install it)
  • Gut the bathroom down to studs / fixable surface
  • Remove the back hallway closet framing and re-frame it properly
  • Install new lighting in the bathroom and front room
  • Have the walls repaired as last time (Skim coating the plaster walls, and dropping the ceiling about an inch with drywall to get a smooth uncracked surface)
  • Insulate the attic properly (currently there is only a few inches of old insulation and it needs significantly more)
  • Replumb the bathroom
  • Tile the bathroom
  • Reinstall windows / doors
  • Paint, install other trim
  • Refinish the floors

I have already gotten started on the project and will add some posts in the next weeks as to what I have already done.  I have taken photos of the progress but I can’t get them off my camera currently.  As soon as I get the photos off I will be posting more updates.

Categories: Grayland House Tags:

This Old House Part 26 of 63453 – Kitchen Photos

February 17th, 2009 Comments off

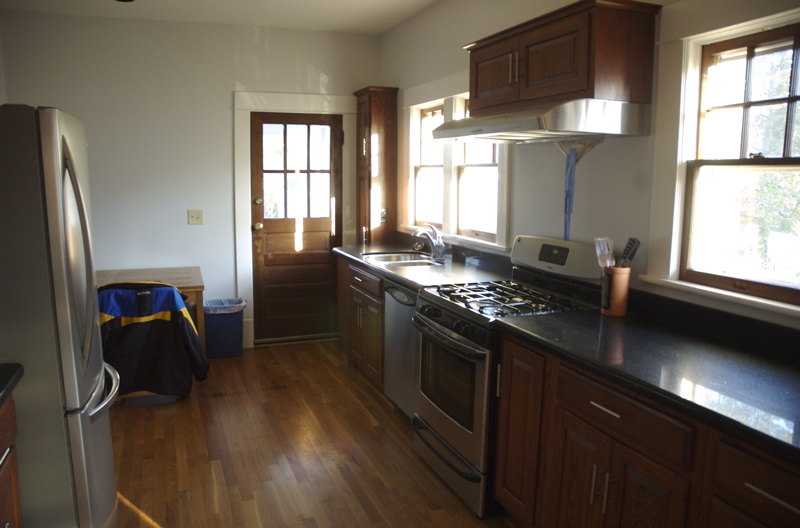
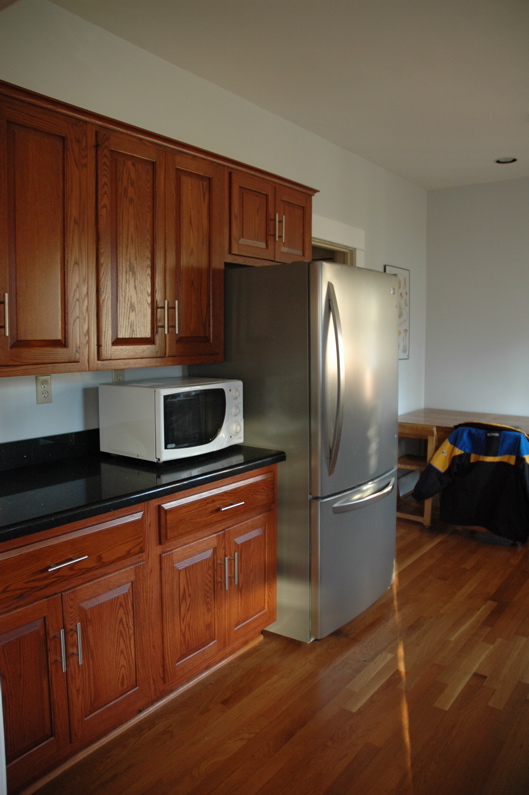
I haven’t posted any photos of the Kitchen and Dining room since I put in all the trim, and removed the paper from the floor.. There are still a FEW things to do, but nothing major.. I need to put up a back splash behind the stove, and some minor trim work.. I have since moved all the furniture back, and my house feels like a house again..

dsc_3496_2
Right (South) side of the kitchen, you can see how nice the floors look.. You can also see the backdoor I finally stained and sealed..

dsc_3499
Left (North) Side..

dsc_3498_2
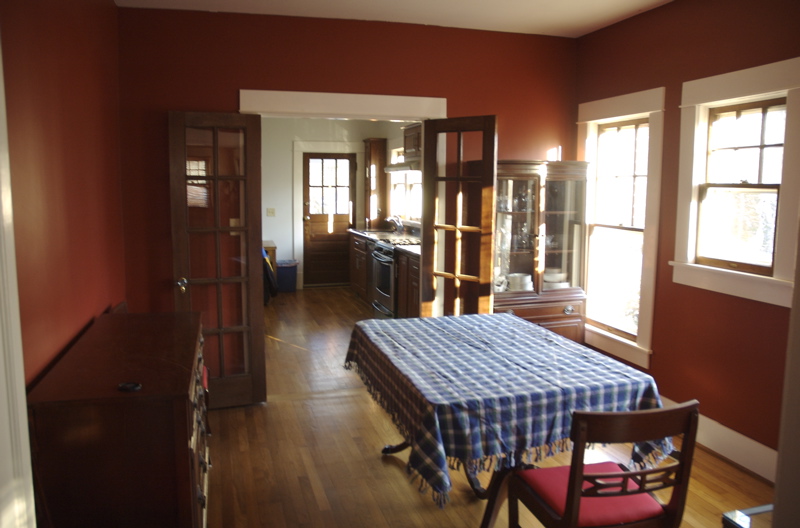
Dining room.. Don’t mind the mismatched table cloth.. You can see all the furniture in, as well as the shoe mould installed as well..

dsc_3500
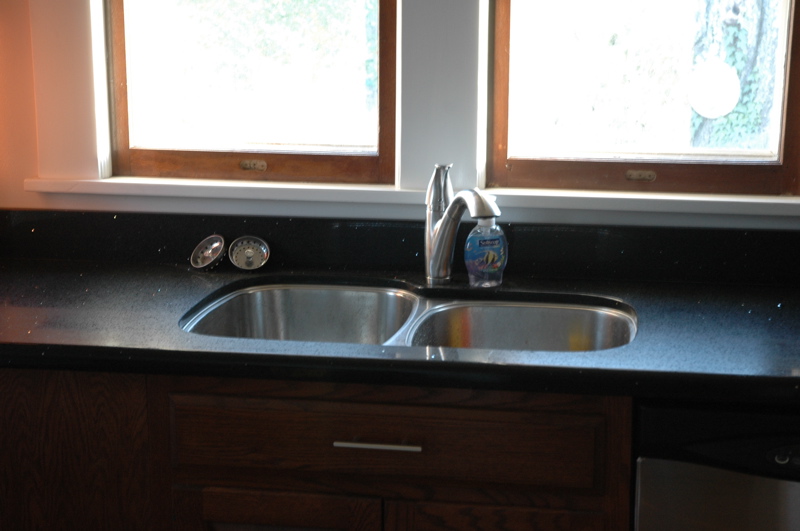
Faucet and sink..

Categories: Grayland House Tags: